Weapon Care

Preventative Medicine
Stage weapons, like the real weapons after which they are modeled, are made primarily of steel, an incredibly strong, but by no means indestructible, substance. They can bend, chip, or break if abused or not properly cared for. Steel’s worst enemy is moisture (and the oxygen it contains), which causes rust that can weaken the metal, making it more likely to break. Rust is also unsightly and can stain costumes, so keep it at bay. Fortunately, avoiding rust is quite simple. Steel’s greatest ally is oil, which helps to clean and protect exposed portions from moisture as well as other corrosive substances such as the oils found in our skin. Handling a steel weapon bare handed can leave rusty fingerprints on steel within a few hours of handling. When selecting oil for your weapons, please choose a wipe on oil, as many spray-on oils (such as WD-40) will evaporate quickly, offering no lasting protection. Look for a light viscosity oil such as gun oil or, our favorite, Marvel Mystery Oil, which is inexpensive, pleasantly scented, and available in the automotive section of many stores. The best “preventative medicine” is to wipe down all parts of the weapon with an oiled rag at the end of every rehearsal and performance or anytime the weapon is handled. Regular maintenance will help ensure that your weapon remains at its best and that you rarely ever have to actually scour away rust. As excessive dust may accumulate on your weapons and allow oxygen to penetrate the oil to the steel and thereby corrode your weapon, a periodic dusting and re-oiling is a good idea.

If, despite your best preventative efforts, surface rusting does occur, it can be removed with any one of a number of abrasives, such as sandpaper, erasing blocks, sanding sponges, or very fine grade steel wool. The most important thing is to use as fine grit as is possible; most abrasives can be found in “extra-fine” or “very-fine” grit and these will not only remove rust but can be used to polish the metal. Sanding sponges are the best as they allow a firm grip and will conform to fullers, ridges, and other irregular portions of the weapon. Begin with the finest grade possible. If the rust does not come off, apply a little more elbow grease… that usually does the trick. If there is a substantial bit of rust, you can use a medium or coarse grit to start and then do successive cleanings with finer grits to fade out the scratching that the coarse abrasives will cause. Be sure to oil the weapon thoroughly after cleaning.

If the weapon is to be stored untouched for long periods of time, we would recommend a paste wax finish be applied to the steel components. Renaissance Wax™ is a great product, if a little expensive, and most paste wax for cars will work as well if you are up for the work. A thorough coating with oil should also do the trick. The key is to allow no oxygen to get to the weapon to start corrosion.

Nicks and Dings
Another common maintenance issue that may arise is the development of small nicks in the blade of the weapon called burrs. These burrs are the result of the blades striking together with excessive force. Note that proper stage combat techniques as taught by trained professional Fight Directors (such as those endorsed by the SAFD), and performed correctly by the actors, should lessen if not eradicate the need for this sort of maintenance. If your blades continually develop deep nicks then it is likely that the actors are hitting too hard. For recommendations of qualified personnel in your area please contact us at any time.

That being said, a flat metal file (do not machine grind!) is all that is needed to smooth away these burrs, which can become as sharp and dangerous as a saw blade. These burrs present an obvious danger to both skin and costumes but there is another potential issue: Subsequent strikes in the same spot can deeply notch the steel and create a weak spot that could cause the blade to break. A daily check will keep the burrs to a minimum and also alert the Fight Director or fight captain to actors that might need a little help in controlling their weapons. When de-burring, make sure to file as little as possible to avoid excess wear on the blade and be careful that you are not sharpening the blade as you do so. Again, it cannot be overstated, that there is nothing better than having a knowledgeable Fight Director’s guidance.

Other Concerns
Many of our swords and daggers are assembled with a threaded tang (the part of the blade that passes through the grip), which screws into the pommel (the round or cylindrical piece that holds the hilt together and counterbalances the blade). This allows the weapon to be disassembled if necessary to replace the blade or other parts of the hilt. Before using the weapon, check to make sure that the pommel is on securely. Note that the pommel should only be on “hand tight” and should never be tightened with a wrench, vise, pliers, or any other tool.

Leather scabbards, hangers, and frogs may be treated with any good quality leather cleaner/preservative such as mink oil or neatsfoot oil. Leather grips on weapons should be allowed to age naturally. Wire wrapped grips should stay clean with a minimum of care and may be oiled lightly when the rest of the weapon is wiped down at the end of the day. If the grips do get oil on them, be sure to wipe them with a dry cloth before rehearsal or performance as this could make the weapon slippery!

See below for special information regarding the care and maintenance of steel shields.

Last Thoughts
Swords, daggers, and other weapons are tools that were designed by humans for use against other humans who tend to be rather soft and yielding. Even the heavily armored knights of the 15th century presented a target with a hard outer layer but that ultimately “gave” a little when struck. What they were NOT designed for is striking concrete walls, chopping down trees, smashing unwanted furniture or automobiles, or swinging full force into an opposing weapon. These activities will eventually destroy any sword no matter when or how it was made. Even weapons designed for stage combat cannot hold up to this type of abuse.

Finally, there is no substitute for having a trained and qualified Fight Director to instruct your actors in the care and use of these or any weapons. The Society of American Fight Directors (SAFD)Fight Directors Canada (FDC) and the British Academy of Stage and Screen Combat (BASSC) are excellent resources. Another great resource in the New York, New Jersey, Connecticut area is Combat Incorporated located in Manhattan, NY. If you have any questions, please do not hesitate to contact us.

Shields have the most interesting visual, rhythmic, and aural potential of any piece of stage combat equipment. They also have a few special needs when being used on stage. Here are the specifications of our most popular style; the “Large Round Steel Shield.”

  • Diameter: 24” (22 ½” formed diameter once beaten into its final shape)
  • Rim: Rolled with simulated riveting
  • Gauge: 16
  • Enarmes: Adjustable Leather Strap for the forearm and Welded Tubular Grip
  • Weight: Approximately 6 ½ pounds

These shields are made of steel and are quite durable and easy to care for. However, they are not indestructible, nor immune to rust. The face of these shields will start to rust if you look at it with a moist eye, so take care to wipe it down with an oiled cloth after each rehearsal or performance. If the face of the shield should begin to show dents, use a rubber mallet with a rounded head to gently pound out the dents from the reverse side. Do this before continual battering compounds the dents and creates an unsafe (and unsightly) piece of equipment. Should the rim get nicks from using the edge to parry, use a crosscut file to keep the burrs (small jagged nicks in the steel) from damaging actors and costumes. Remember that axes, maces, hammers, and other heavy weapons were designed to smash both armor and shields, so use these weapons with care. A little daily maintenance and care will keep the shields safe and looking good and will prevent a last minute scramble to undo weeks of use before they are returned.

If you have any questions or concerns, please don’t hesitate to contact us.

Always treat EVERY gun, rubber or otherwise, with the same care as you would a real live-fire weapon.

Our replica guns are either deactivated blank firing guns no longer capable of firing blanks or inert detailed replicas of actual weapons, many of which are designed for Law Enforcement and Military Training. These weapons look exactly like the live-fire guns they are modeled after and will certainly be mistaken as such by the public, particularly law enforcement personnel, if displayed outside of the theatrical performance. Law enforcement personnel are trained to respond with deadly force when confronted with individuals carrying firearms of any sort. Although many of our period weapons, such as dueling pistols, may look archaic, it is wise to assume that an armed officer will view them as a deadly weapon and respond accordingly.

For the safety of everyone involved, never display or carry these weapons outside of rehearsal or performance.

Our replica weapons are made from a variety of materials ranging from strong, impact-resistant polyurethane with steel reinforcement to cast metal and plastic. That being said, none of these weapons are indestructible. Quite the contrary, they will chip or break if dropped or used to strike other hard surfaces, particularly the rifles and cast metal pistols although our rubber handguns can be dropped onto most surfaces with little risk of wear. If in doubt about a certain piece and its durability for a specific action, please ask us. Most of these weapons cannot be readily fixed if broken and may need to be replaced if damaged. Replicas with moving parts (triggers, slides and hammers) should not be “dry fired” as this will cause the mechanisms to wear out. If they are needed to “fire” in production, this action should be limited to actual rehearsals/performances only. Generally, if treated with the same care and respect a character would treat an actual live-fire weapon, they should survive quite well.

If you have any questions or concerns, please don’t hesitate to contact us.

If you have decided to rent a spear or other pole arm but do not wish to incur the expense of shipping such a large item, you might wish to rent only the head and counterweight and mount them yourself. Your Fight Director should be able to assist you in this endeavor and you should certainly consult with her/him when acquiring the material for the haft. What follows are a few basic guidelines for the assembly procedure.

  1. Obtain a wooden haft of the appropriate length and diameter or slightly longer and larger. To determine the diameter of the haft needed, measure the outside diameter of the weapon or counterweight socket, and go with the largest on each weapon if they are different. You can purchase these at Lowe’s, Home Depot, or the like. When deciding on the lengths, remember to account for the length of the weapon and counterweight. The Halberd head, for instance, will add 14” or so to the total pole arm length. I generally go with a pole about 6 feet in length, giving an overall length of close to 8 feet but your individual needs will certainly dictate this choice.
  2. You will want to shape the ends of the pole to fit as closely as possible into the sockets, tapering it to fit snugly. You will want to get the pole seated as deeply as possible into the steel ends, so take your time. I also like to make the sides of the pole flush with the head or counterweight of the weapon. This means that the taper will stop and form a 90 degree “shelf” that the head or counterweight will stop against. It just looks cleaner and makes the fit better. Note: The pole should have to be pounded into place a little to ensure a good fit, so take your time and get it close to fit. Once it almost fits, secure the pole, place a block of 2×4 on the head or counterweight and use a mallet to pound it the rest of the way in. Never strike the bare steel or the end of the haft as it may splinter and ruin your hard work.
  3. If you plan to stain the pole, do it after sanding/tapering and before attaching the steel parts. I like to “scar” up the poles to give them a battle worn appearance, especially near the “business” end, before staining. I do this with a blunt dagger blade but the unsharpened edge of a cleaver or knife, the side of a file, etc. will do it too. Just hack away a little, making shallow dents in the wood that resemble sword cuts. Do not use a sharp implement and do not cut into the wood. The stain will accentuate the “worn” pattern. If you get a pole with a varnish on it, you will have to sand that down to bare wood before staining.
  4. Use screws to attach the heads and counterweights to the prepared pole. Wood screws of the right size (#8 or #10 depending on the piece) will do. Make sure it is not too long (1” or ¾” generally works) and be sure to drill a pilot hole before putting in the screw. Do not over-tighten the screw or force larger screws into the hole of the head/counterweight as it will break off and the heads/counterweights will be very difficult to remove. Use a screw driver instead of a drill and you will save the anger and frustration when the screw snaps off… I’d like to say I have never done this myself but I shouldn’t lie.
  5. You might want to “stud-up” the hafts for decorative purpose. I use upholstery nails in a simple repeating pattern which you can get in brass, silver, and antique metallic finishes at hardware stores. These may get knocked loose if used in combat so you might only want to use them for non-combat props. Use epoxy on the back of each nail to ensure that it won’t fall out.

If you have any questions at all, please contact us.

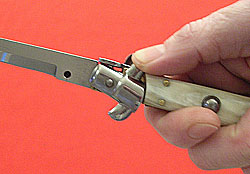
Switchblades are mechanical devices and need a little care when being used on stage. Below are a few tips to consider when incorporating these very dramatic props into a production.

  • First and foremost is opening and closing the knife. Opening is easy; press the button, making sure not to have your fingers in the way. A little trial and error will smooth this process out nicely. Make sure the safety catch is not engaged when attempting to open the switchblade.
  • Closing is a little trickier. You need to swivel aside the guard which releases the locking mechanism holding the blade in place. Since a picture is worth a thousand words, check out this photo.
  • There is a safety switch (used to prevent the knife from accidentally opening) located under the “button” that opens the knife. This could become loose and could engage at an inopportune time, preventing the blade from opening when you want it to. A small piece of electrical tape can ensure that the safety does not engage unexpectedly. That being said, if you are keeping the knife in a pocket where the button might get pressed accidentally, this could be a bad idea. A switchblade that opens in the pocket can be embarrassing and possibly painful! You will need to make that judgment call.
  • Should your switchblade not spring fully open, it is most likely because dust or dirt has gotten into the knife’s mechanism. A can of compressed air cleans this out nicely and a little spray of WD-40 around the area where the blade swivels in the handle (see photo again) will keep it working smoothly.
  • Remember that, like any mechanical device, a switchblade may cease to work properly or break if dropped, opened and closed excessively, or otherwise abused.
  • Even though the blades on these theatrical switchblades are dulled and the points blunted, they are still made of steel and capable of penetrating the body if force is applied. Always use a qualified Fight Director to train your actors in the proper use of this weapon or any prop to be used as a weapon.

If you have any questions, please contact us.